
Minecraft skin guide
How to Edit Minecraft Skin Outer Layers
Use the outer layer for hair, hats, jackets and raised details, erase pixels to reveal the base, and check the result from every angle in 3D.
Minecraft skins can contain two complete visual layers: the base body and a second texture shell rendered just above it. That outer shell is what makes hair look fuller, gives a jacket a raised edge, or places glasses in front of the face.
The outer layer works best as detail, with transparency around it. If every outer pixel is opaque, it covers the base and can make the character look bulky or duplicated. The BlockSkinLab Minecraft Skin Editor lets you switch between both layers and see the result directly on the 3D character.
Minecraft Skin Base vs Outer Layer
The Base layer forms the main head, torso, arms, and legs. It should contain the complete version of the character: face, hair color, shirt, trousers, shoes, and any detail that must always remain visible.
The Outer layer is a slightly enlarged shell around those same parts. Minecraft skin maps use different names for its regions:
- Head outer layer is often called the hat layer.
- Torso outer layer is often called the jacket layer.
- Arm outer layers are often called sleeves.
- Leg outer layers are often called pants layers.
Those labels describe texture regions, not fixed clothing types. You can use the head outer layer for hair or glasses, the jacket for armor or a hoodie edge, and the sleeves for cuffs or gloves.
Transparent pixels are the key. They allow selected details to float above the base while the rest of the underlying face or clothes remains visible.
Real example: adding raised jacket accents
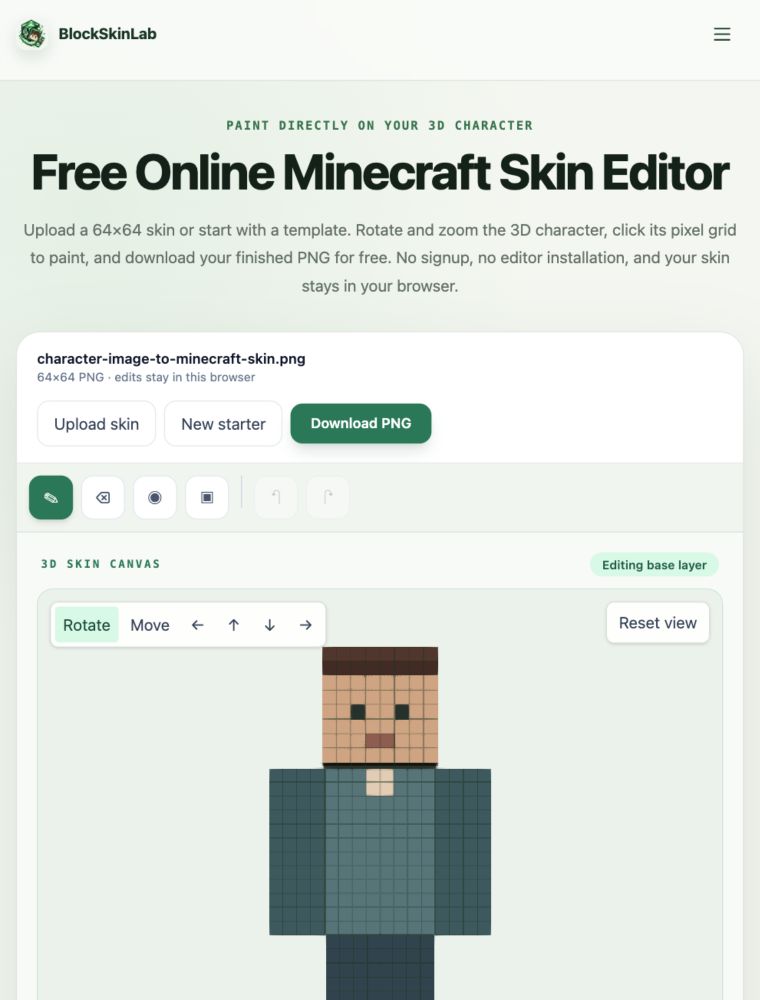
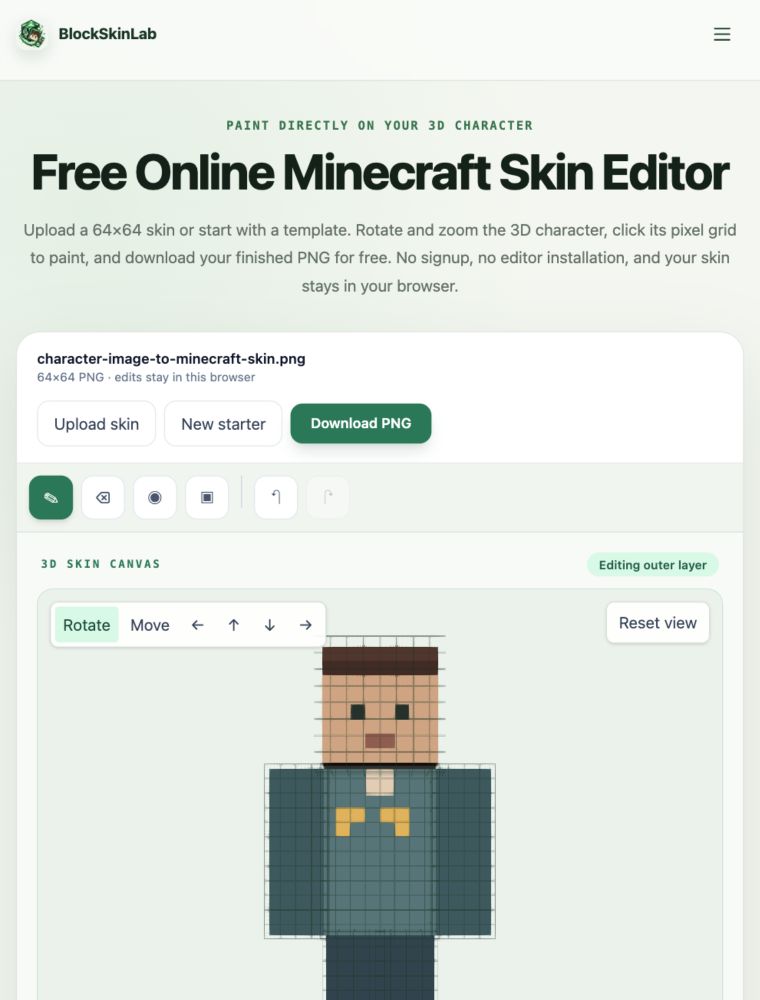
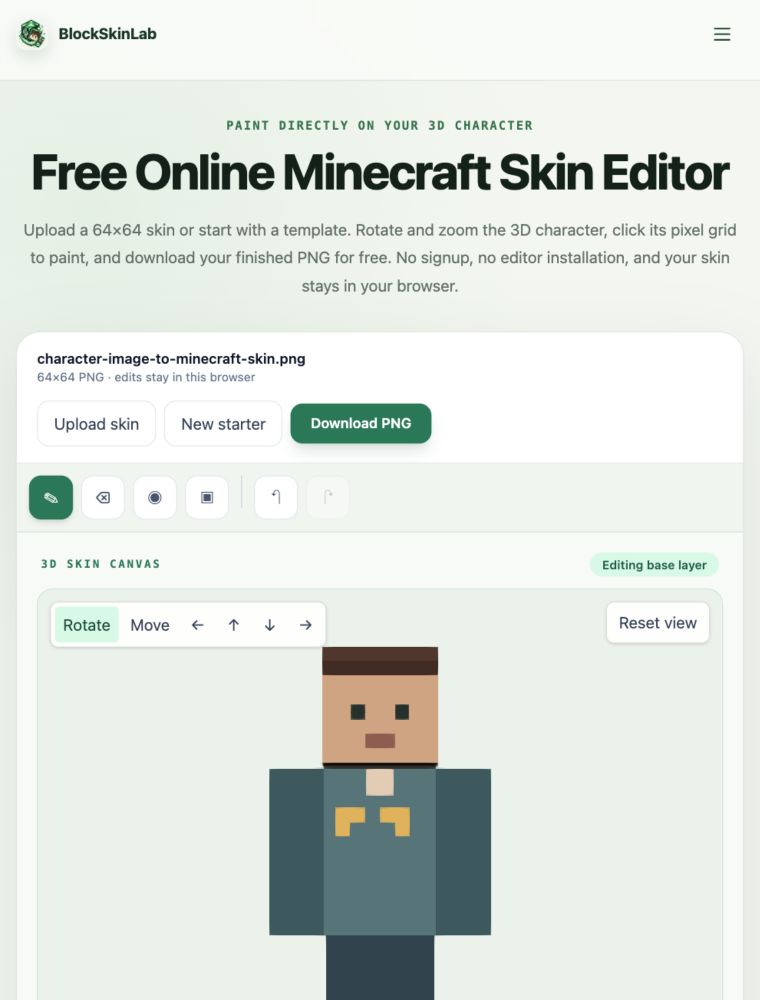
The three screenshots below come from one real editing session with the same 64×64 skin. We first hid the outer layer to confirm the complete base, then selected Outer and painted yellow jacket accents on the torso shell. Finally, we returned to Base and turned the grid off while keeping the outer layer visible to check the combined result.
How to Edit a Minecraft Skin Outer Layer
Step 1 — Upload the skin and select its model
Open the 3D Minecraft Skin Editor, choose Upload skin, and select a modern 64×64 PNG. Match Classic 4px or Slim 3px before painting arm details. Switching the model later does not convert the arm texture.
Step 2 — Inspect the base first
Leave Base selected and rotate the model. Check what already exists under the hair, jacket, sleeves, and trouser details. Turn Show outer layer off when an opaque overlay blocks your view.
Repair the underlying face or clothing before building on top. A transparent gap in the outer layer will reveal whatever base pixel is directly below it.
Step 3 — Select Outer
Choose Outer under Paint layer. The editor automatically shows the outer layer while you work on it. The status above the canvas changes to Editing outer layer.
Choose Pick color to reuse a shade from the current outer texture, Pencil to paint one pixel, or Fill connected area to replace one connected same-color patch on the clicked face.
Step 4 — Paint from every angle
Start with the front, then rotate to the sides and back. A jacket front does not automatically continue around the torso, and a hair fringe does not fill the sides or back of the head.
Turn on Spread limbs when editing sleeves or pants layers. It separates the arms and legs so you can reach the inner faces. Look from above and below for the top of a hat, shoulders, cuffs, and trouser hems.
Step 5 — Compare with and without the outer layer
Toggle Show outer layer off to inspect the base, then on to judge the combined result. Turn Pixel grid off for a clean preview. These controls only change the preview; they do not delete texture pixels.
Step 6 — Download the PNG
Choose Download PNG after checking every surface. The output contains the base and outer texture regions in one standard 64×64 skin file. Download before leaving because the page does not autosave the session.
How to Make Outer-Layer Pixels Transparent
Select Outer, choose Transparent eraser, and click the square you want to clear. The base color below it becomes visible immediately.
Use transparency to:
- Open the area around glasses instead of covering the whole face.
- Separate locks of hair along the forehead and sides.
- Shape the bottom edge of a jacket or hoodie.
- Create gaps between armor plates.
- Remove accidental solid color from a sleeve or pants layer.
Transparent eraser removes the outer texture pixel; it does not restore a previous outer color. Use Undo immediately after a mistake. Reset entire skin restores the originally opened PNG but also discards every other edit made since it was loaded.
Be careful when Base is selected. Erasing on Base clears the underlying texture pixel instead of merely revealing another layer.
Outer-Layer Design Examples
Hair
Keep the main hair color and full hairstyle readable on Base. Add a few outer pixels for bangs, side locks, or volume on the top and back. Leave gaps around the eyes so the face does not look covered by a solid box.
Hats and hoods
Use the head outer layer for the visible hat or hood surface. Continue the design around all six head faces. A standard outer layer follows the cube; it cannot create a brim that extends far from the head or a pointed hood with new geometry.
Jackets and hoodies
Place the complete shirt or hoodie color on Base. Use the torso outer layer for an open jacket edge, zipper border, pockets, armor plate, or hem. Use arm outer layers for sleeves and cuffs. Clear pixels where the base shirt should show through.
Glasses and masks
Keep the face itself on Base. Add frames, goggles, or a mask edge to the head outer layer. Use transparency between the frame pixels so the eyes and skin remain visible.
Armor accents
Use small outer patches on the torso, shoulders, arms, or legs to imply plates. The texture sits only slightly above the body; it cannot add spikes, horns, weapons, wings, or a backpack.
Common Outer-Layer Problems
The outer layer looks like a second body
Too many pixels are opaque. Clear the unused outer regions and keep only the details that should appear raised. Compare with Show outer layer off to see how much of the base is being covered.
Hair or a jacket disappears
First confirm the detail is painted on Outer and that Show outer layer is enabled in BlockSkinLab. If it appears in the editor but not in the game, the PNG is probably intact: check Minecraft's player skin customization settings for the hat, jacket, left and right sleeves, and pants layers. A viewer or server can also hide overlays. Keep the essential design on Base so the character remains readable when those parts are disabled.
The front looks right but the side is blank
Each face has its own texture region. Rotate the model and continue the design on the left, right, back, top, or bottom surface. Edges only look continuous when both adjoining faces are painted deliberately.
Sleeve pixels look cut off
Check Classic versus Slim. A model mismatch changes the apparent arm width and can expose or hide a column. Changing the preview does not rearrange the PNG, so use the model the skin was created for. The Classic vs Slim repair guide shows the shoulder and sleeve clues to inspect.
The eraser exposes an unexpected color
That color is on Base below the erased outer pixel. Hide the outer layer, switch to Base, and correct the underlying pixel. Then show Outer again and continue.
For a map of every base and overlay region in the flat PNG, use the Minecraft skin template guide. For general recoloring and full-body editing, follow how to edit an existing Minecraft skin.
FAQ
What is the outer layer of a Minecraft skin?
The outer layer is a second set of texture regions rendered slightly above the base body. It is used for hair, hats, glasses, jacket edges, sleeves, trouser details, cuffs, pockets, and armor-like accents. Transparent outer pixels reveal the base below.
How do I edit the outer layer of a Minecraft skin?
Upload a modern 64×64 PNG to the BlockSkinLab Minecraft Skin Editor, select Outer under Paint layer, and click visible pixels on the 3D character. Use Show outer layer to compare the overlay with the base and Transparent eraser to remove unwanted outer pixels.
How do I make a Minecraft skin layer transparent?
Select Outer, choose Transparent eraser, and click the outer pixel you want to clear. The base color underneath becomes visible. Use Undo if you erase the wrong pixel, and check every side before downloading.
Why does the transparent eraser show another color instead of a hole?
On the outer layer, transparency reveals the base texture directly underneath. That is expected. A transparent outer pixel does not remove the base pixel or create an empty space in the character model.
Can I add a real 3D hat, cape, horns, or wings with the outer layer?
No. A standard skin outer layer is a slightly raised texture shell around existing body parts. It can suggest hair, a hat, cuffs, or armor edges, but it cannot add separate geometry such as a cape, horns, wings, a backpack, or a Marketplace accessory.
Why does my jacket cover the shirt underneath?
Opaque jacket pixels on the outer torso sit above the base shirt. Clear the outer pixels where the shirt should show, or temporarily turn off Show outer layer to inspect and edit the base.
Why is my Minecraft skin outer layer not showing?
Confirm that Show outer layer is enabled in the editor and that the relevant outer pixels are opaque. In Minecraft, player skin customization settings or a viewer can also hide outer parts. Keep essential face and clothing information on the base layer.
Does the Minecraft skin outer layer work in Java and Bedrock?
The modern 64×64 layout includes outer regions for the head, torso, arms, and legs. A standard skin can use them in Java and on Bedrock devices that accept custom skin PNGs, although display and import options vary by platform.